
Connect
By activating CheckProof Connect you will receive real-time data for odometers and GPS positions of your equipment.
Follow the steps below to discover how to use “CheckProof Connect”.
Connect Tab
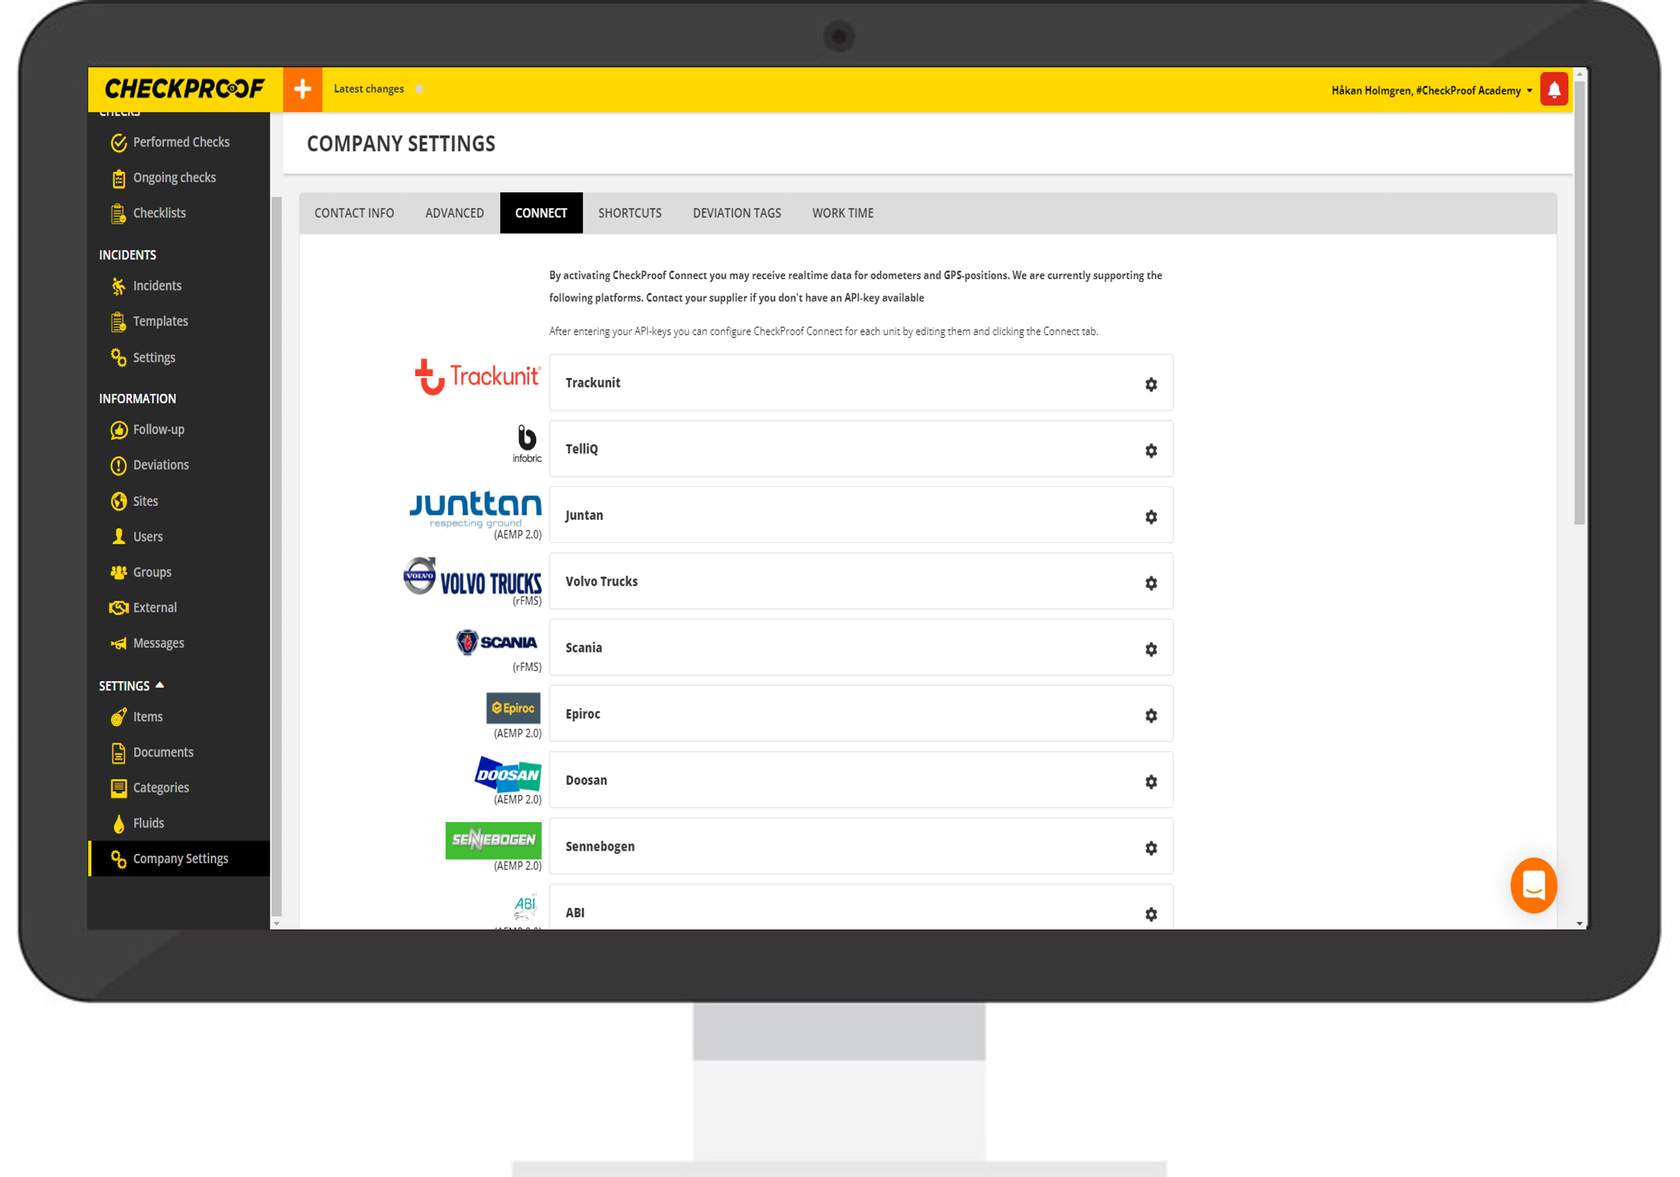
From this tab, you can view all of the platforms that CheckProof currently supports.
To access the “Connect” tab, follow these steps:
- Click on “Settings” in the left menu.
- Click on “Company Settings” under “Settings”.
- Navigate to the “Connect” tab at the top of the screen.
Add API key
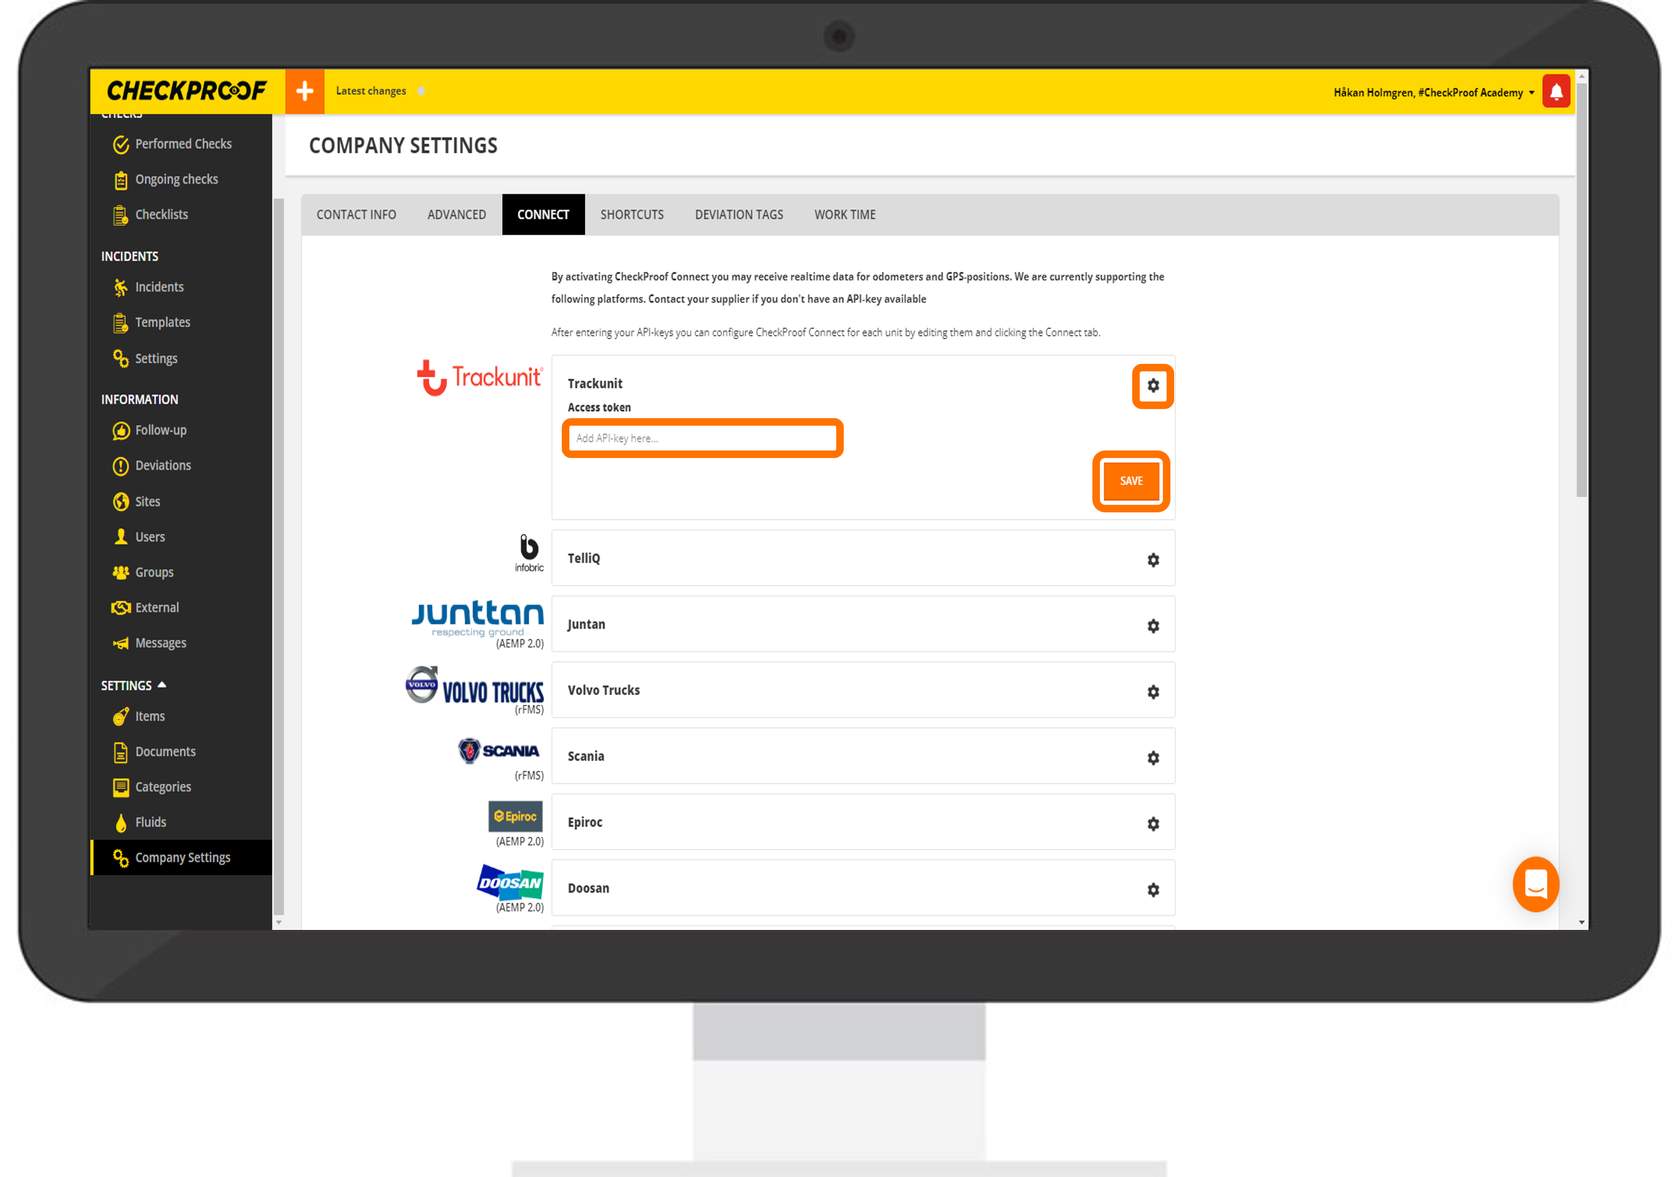
To connect your equipment, enter the information provided by your equipment supplier e.g. API key or Client ID.
- Click on the cogwheel icon.
- Enter the information from your equipment supplier.
- Click on “Save”.
This will import all the odometers and GPS positions of your units to CheckProof.
Connect Unit to API
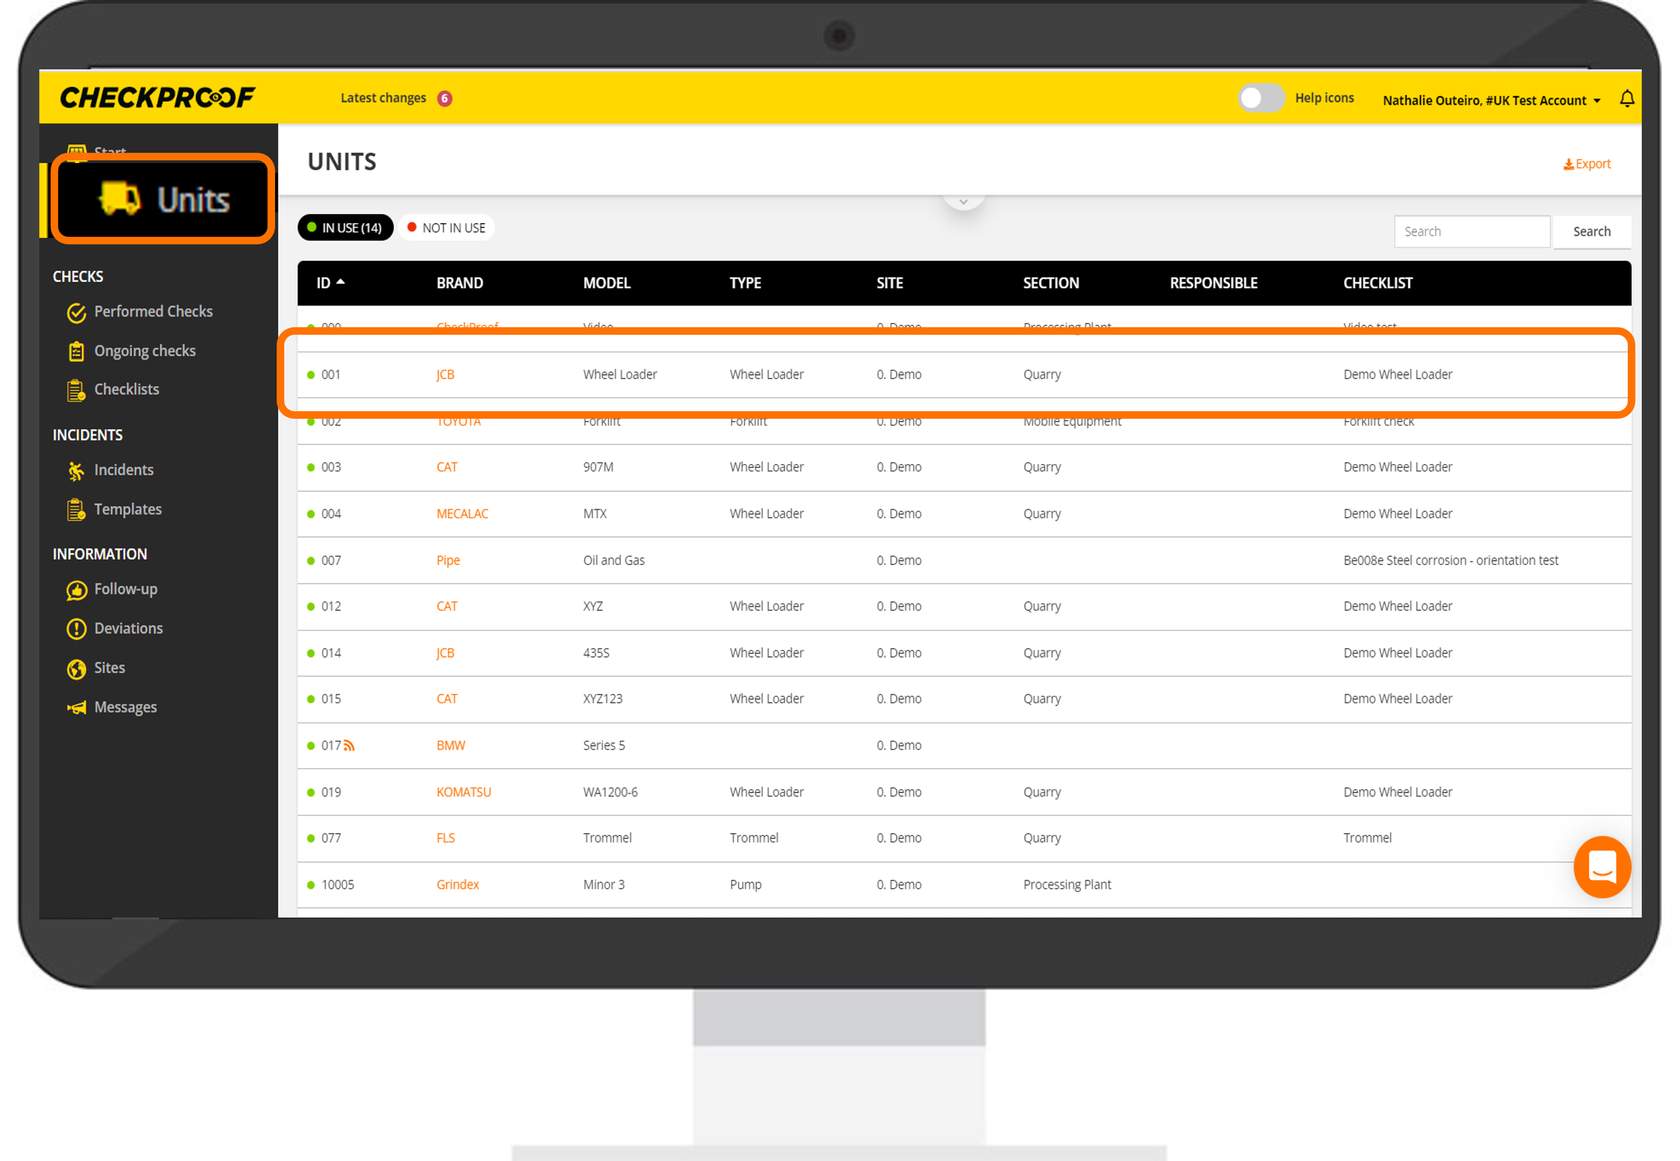
Now you need to connect your unit to the API in the CheckProof database.
- Access the unit from the “Units” menu.
- Click on the unit that you want to connect.
Edit
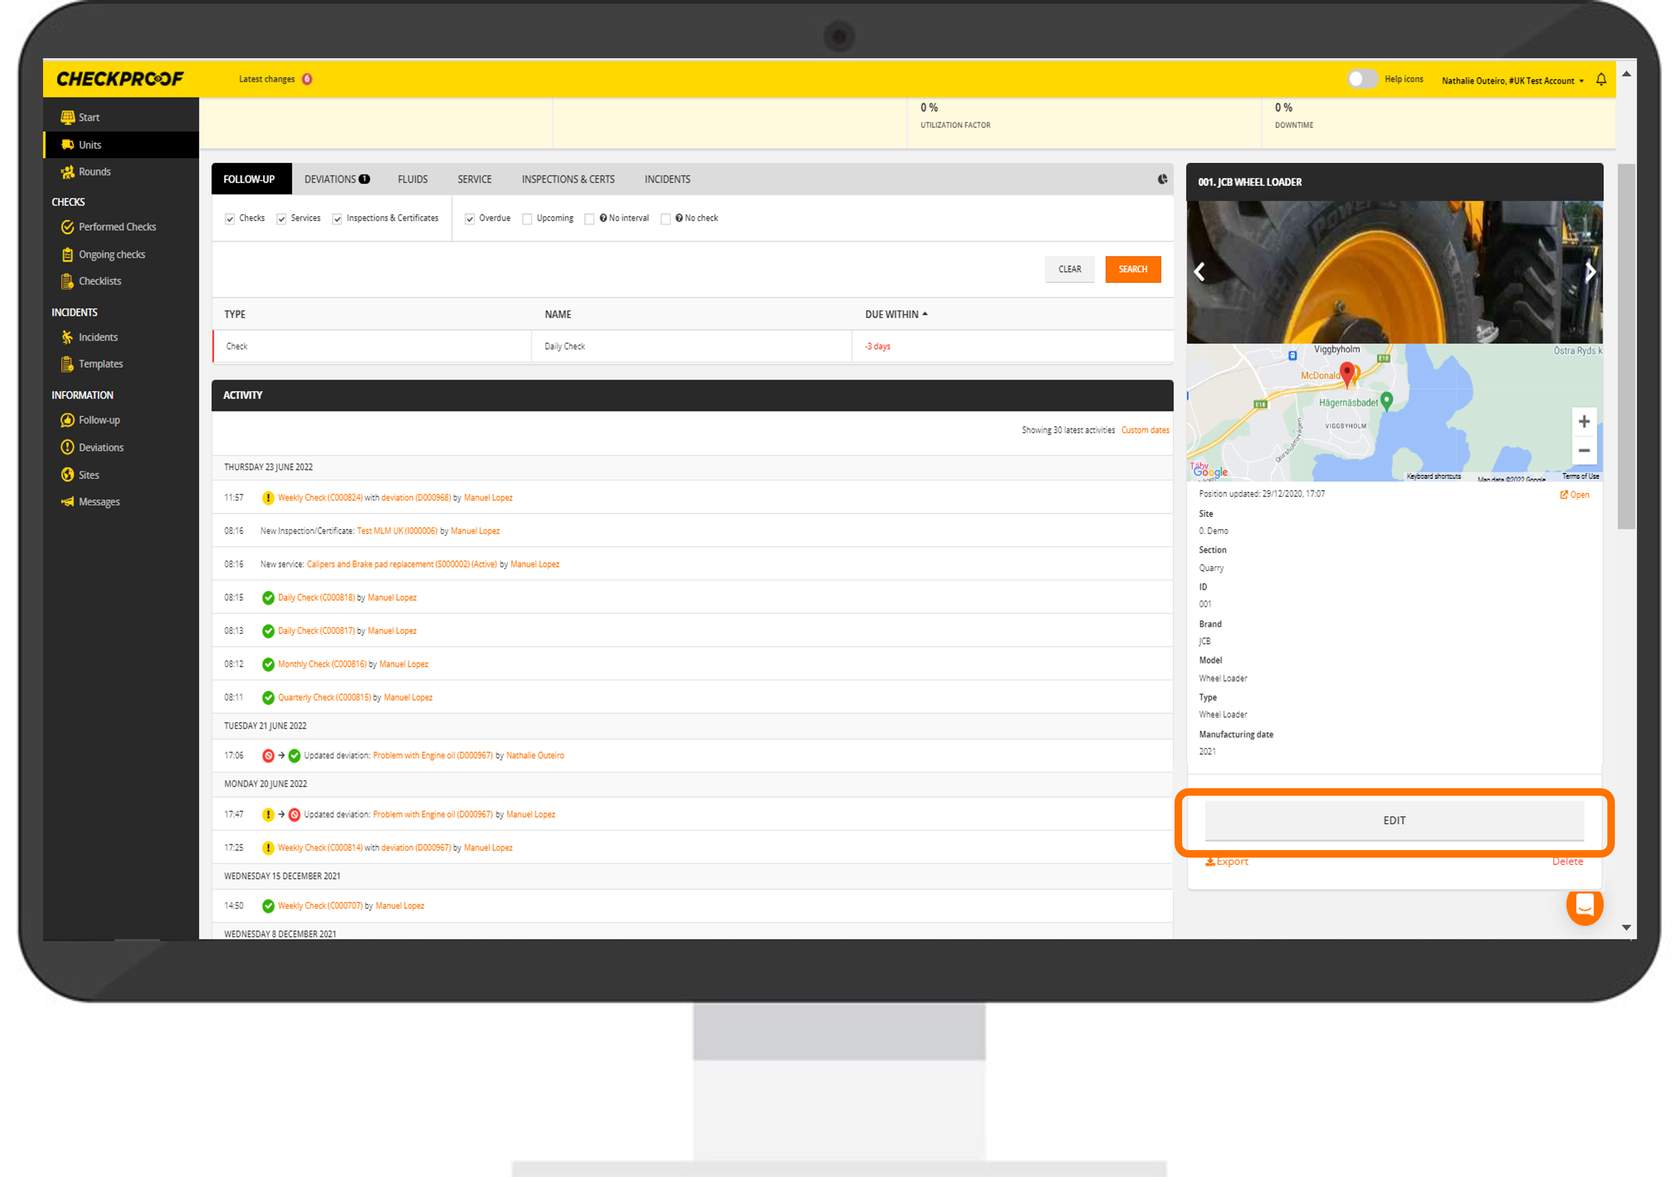
Click on “Edit” to open the unit editor.
Connect
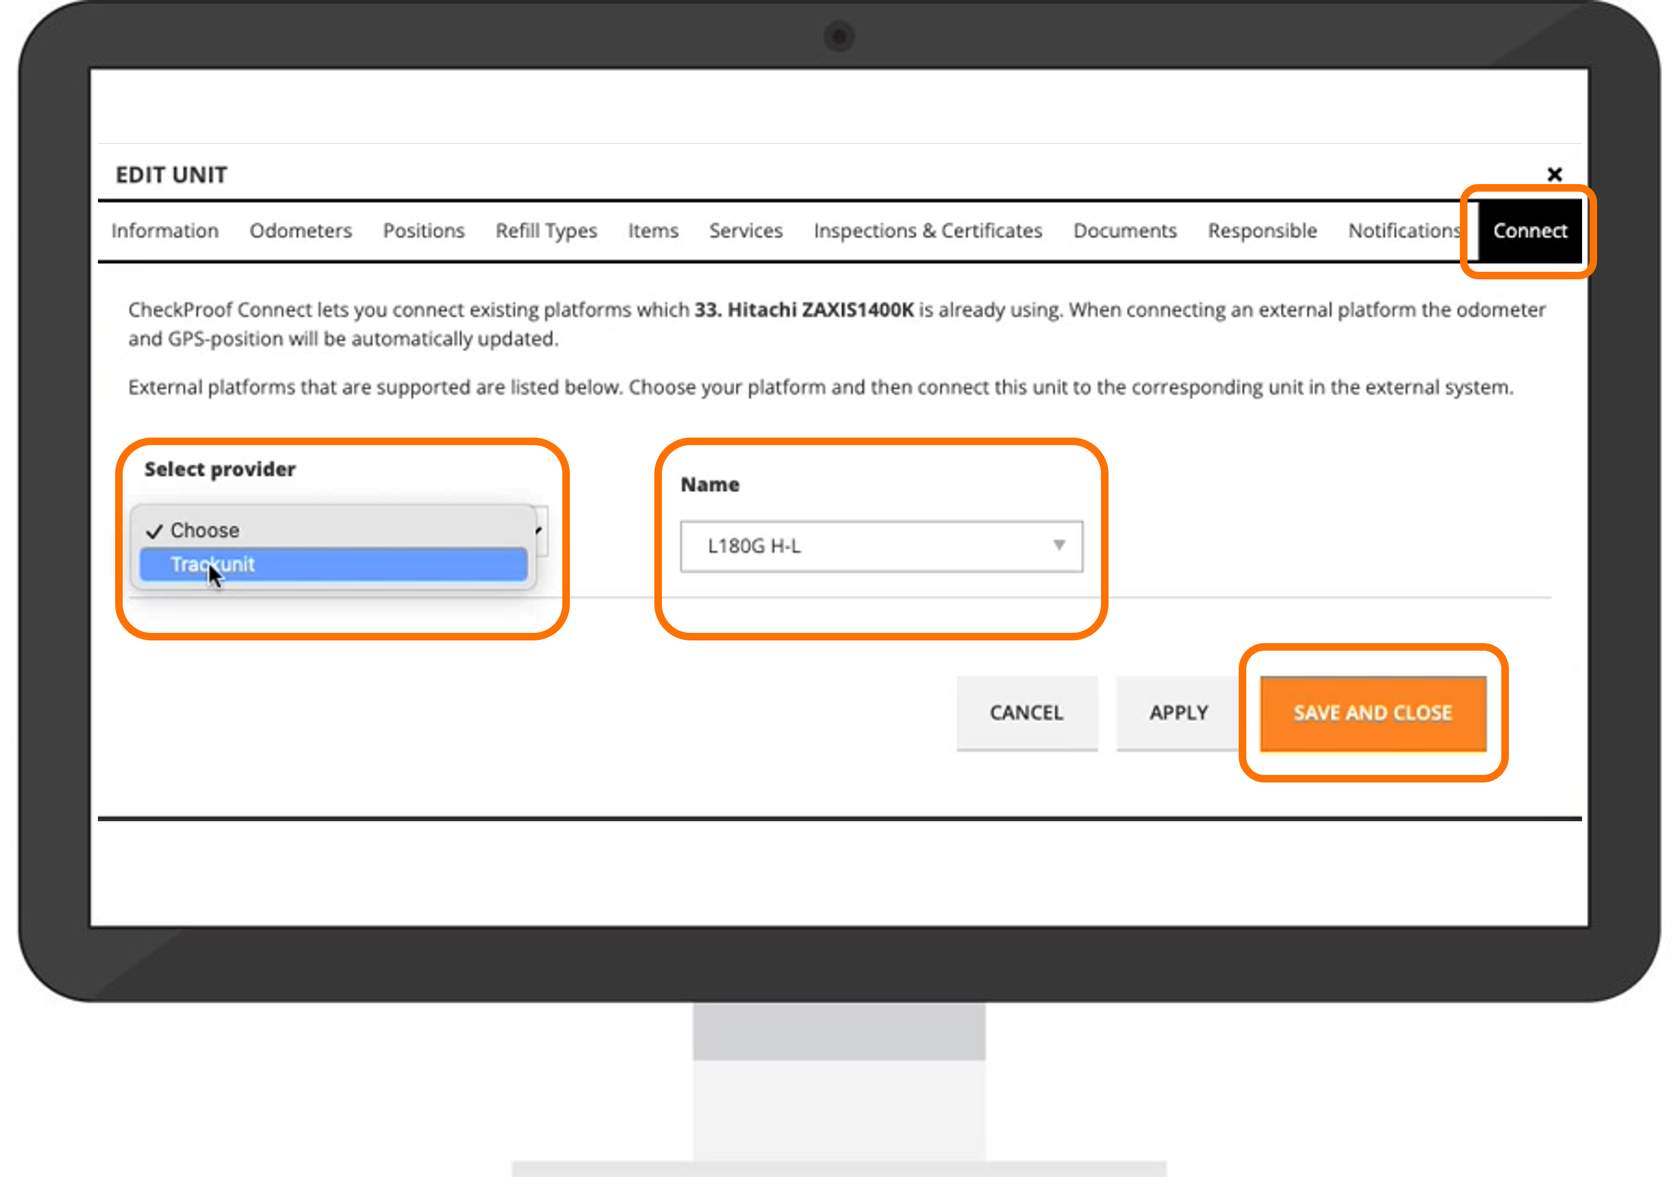
From the “Connect” tab:
- Select the provider from the drop-down list.
- Select the corresponding unit in the “Name” field.
Here you will find all the available providers that you’ve imported to CheckProof and the corresponding units.
- Click on “Save”.
Great Now you know how to connect your unit.

Now you can see the updated information on your odometer and the equipment’s GPS position.
This information is updated every 15 minutes.